如果你作为Nacos的初识者,或者想快速了解Nacos的上手难度,希望本篇可以帮助到你。
1、快速开始
1.1 引入依赖
1
2
3
4
| <dependency>
<groupId>com.alibaba.cloud</groupId>
<artifactId>spring-cloud-starter-alibaba-nacos-discovery</artifactId>
</dependency>
|
1.2 应用配置
1
2
3
4
5
6
7
| spring:
cloud:
nacos:
discovery:
server-addr: nacos-host:80
namespace: e5aebd28-1c15-4991-a36e-0865bb5af930
group: ${spring.profiles.active}
|
1.3 启动应用
在项目的启动类中添加@EnableDiscoveryClient的注解。
1
2
3
4
5
6
7
| @SpringBootApplication
@EnableDiscoveryClient
public class UserProviderApplication {
public static void main(String[] args) {
SpringApplication.run(UserProviderApplication.class, args);
}
}
|
1.4 查看实例
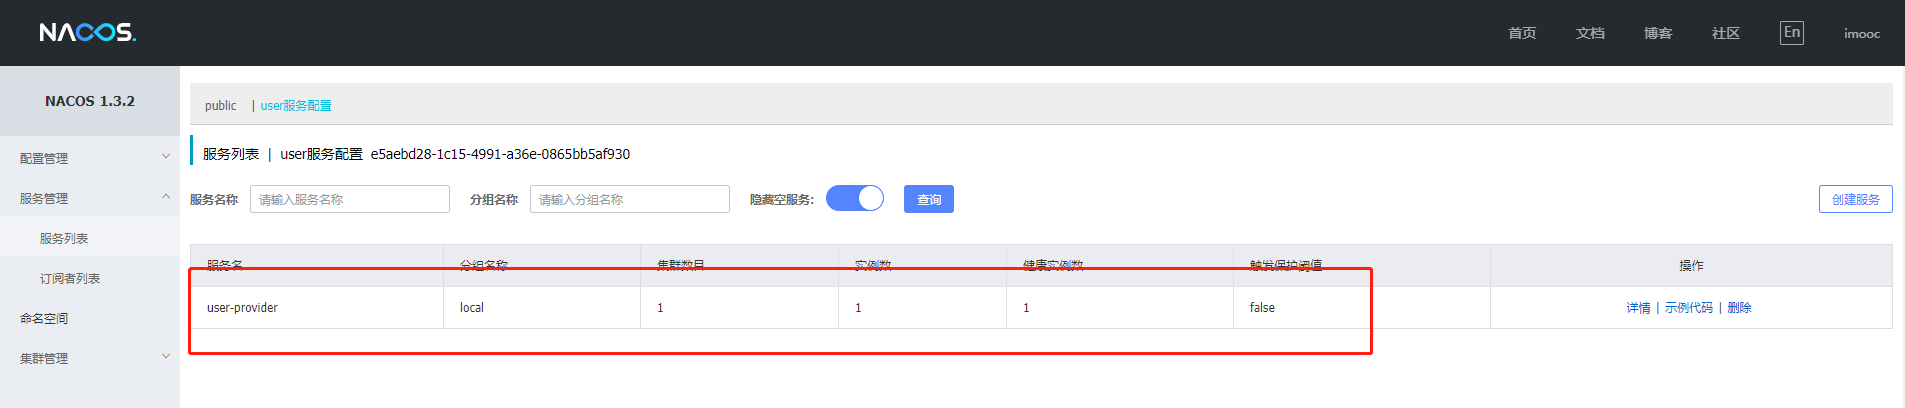
详情如下:

2、使用Feign完成服务的调用
2.1 引入依赖
1
2
3
4
5
| <dependency>
<groupId>org.springframework.cloud</groupId>
<artifactId>spring-cloud-starter-openfeign</artifactId>
<version>2.2.2.RELEASE</version>
</dependency>
|
2.2 启动类
启动类上添加@EnableFeignClients的注解。
1
2
3
4
5
6
7
8
| @SpringBootApplication
@EnableDiscoveryClient
@EnableFeignClients
public class UserConsumerApplication {
public static void main(String[] args) {
SpringApplication.run(UserConsumerApplication.class, args);
}
}
|
2.3 应用配置
1
2
3
| feign:
hystrix:
enabled: true
|
2.4 使用示例
1
2
3
4
5
6
7
8
9
10
11
12
13
| @FeignClient(name = "user-provider",fallback = UserServiceFallback.class)
public interface UserService {
@RequestMapping("/user/config")
String config();
}
@Service
public class UserServiceFallback implements UserService {
@Override
public String config() {
return "user-fallback";
}
}
|
controller 调用如下。
1
2
3
4
5
6
7
| @Autowired
private UserService userService;
@RequestMapping("consumer-feign")
public String userService() {
return userService.config();
}
|
3、使用Ribbon完成服务的调用
我们只需要将RestTemplate实例化,并添加@LoadBalanced注解就可以了,如下:
1
2
3
4
5
| @Bean
@LoadBalanced
public RestTemplate restTemplate(){
return new RestTemplate();
}
|
然后在,controller中,我们使用这个实例化好的RestTemplate,就可以了,具体实现如下:
1
2
3
4
5
6
7
8
| @Autowired
private RestTemplate restTemplate;
@RequestMapping("consumer-ribbon")
public String consumerribbon() {
String url = "http://user-provider/user/config";
return restTemplate.getForObject(url, String.class);
}
|
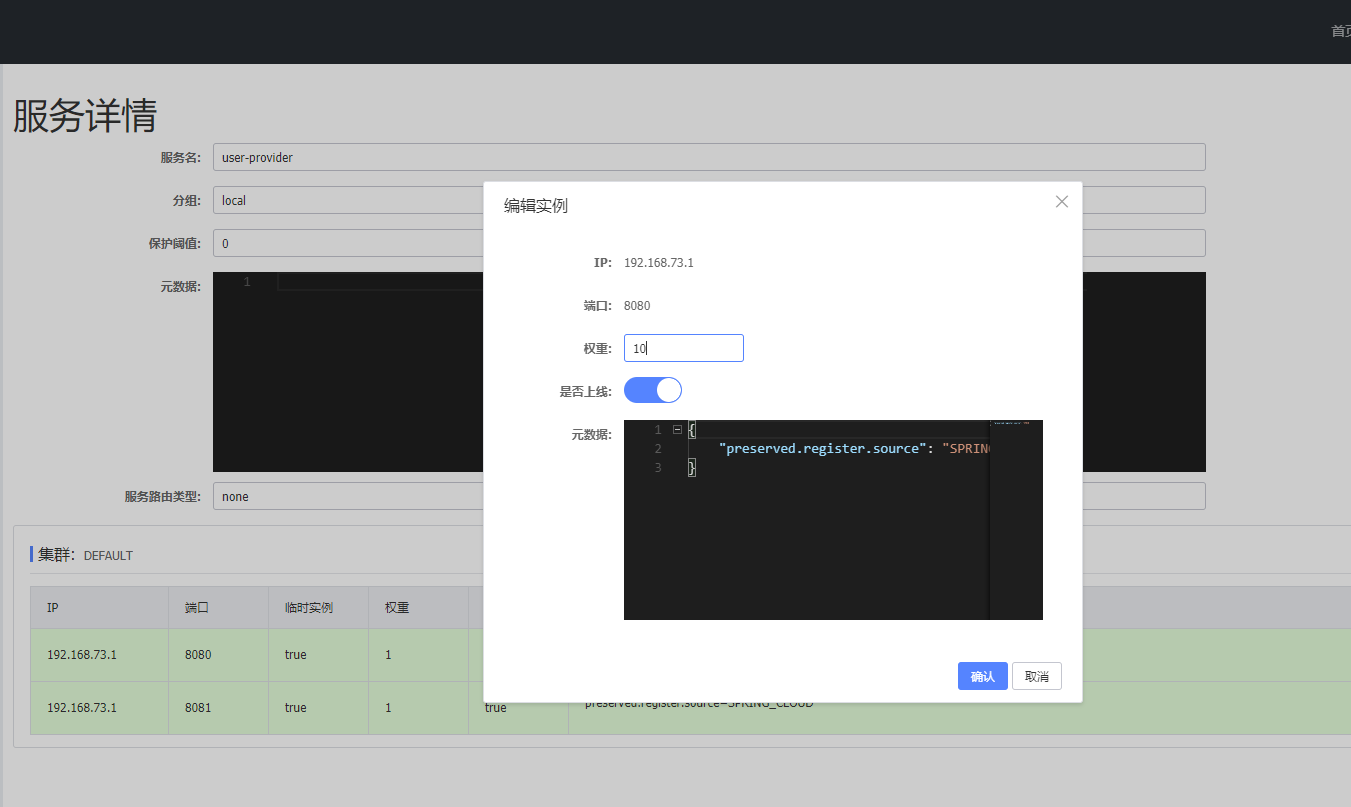
4、使用Nacos权重负载均衡
4.1 修改权重
三种服务的调用方法都给大家介绍完了,但是,他们的负载均衡策略都是轮询,这有点不符合我们的要求,我们进入到Nacos的管理后台,调节一下服务的权重,如图:
4.2 修改 Ribbon 的默认策略
1
2
3
| user-provider:
ribbon:
NFLoadBalancerRuleClassName: com.alibaba.cloud.nacos.ribbon.NacosRule
|
小结
本文介绍了Nacos注册中心入门使用,并介绍了通过Feign及Ribbon完成服务间调用,Nacos也实现了基于权重的负载均衡策略,这点可以搭配Ribbon使用。

